
Quilt Maker Pro 20

A fresh User Interface for the top-of-the-line quilting machine.
Some Context
Roles & Contributions:
Project manager, Product Designer, Sketch Artist, Photographer, and more!
Project Timeline:
9 months
Business Affiliate:
Janome America
Collaborators & Stakeholders:
Subject Matter Experts (longarm quilters), Product Manufacturer Team, Software Developer, Photographer, Business Manager
The Challenge
Janome was launching their latest and greatest quilting machine, but it wasn’t user-ready. It was up to me to design a graphical user interface that applied the Quilt Maker Pro branding to a premium product with loads of new features.
In completing this project I was met with a number of personal challenges and restrictions.
Subject Matter Novice
I had never used a longarm quilting machine so many of the features I was designing for were alien to me. Normally I would ask one of our longarm experts to give a demonstration on one of our office machines, but that was not an option with COVID-19 restrictions.
UI Only
This machine’s features and interactions had already been determined by the manufacturer. I had flexibility in only the design and layout of the interactive elements.
Working in the Brand
Users were already acquainted with the Quilt Maker Pro line, this latest model was preceded by the QMP16, QMP18, and QMP Versa. The user interface should fall in line with the look users have grown familiar with and give the feeling that they are interacting with a premium product.
Design Team of One
Around the time this project was kicking off, I found myself as the only designer at Janome. Before then, I had more experienced designers that I could lean on for guidance and feedback. In their absence I was challenged to self-manage the project, figure out the creative workflow, and collaborate with stakeholders.
The User
Persona
While designing the user interface, I considered how the end user would interact with the design. Because I had done regular research into Janome’s customer base, I was able to create a user persona for a typical Quilt Maker Pro 20 user.

Carol
The Life-Long Quilter
AGED 45+
PROFESSIONAL OR
SERIOUS HOBBYIST
EXPERIENCED WITH
QUILTING MACHINES
Goals
Assemble their quilt sandwich into a finished quilt
Create beautiful designs with stitching
Make progress on their project with as few pauses as possible
Tasks
Keep track of thread usage
Trace stitching pattern
Thread machine
Maneuver needle point
Diagnose and fix machine malfunctions
Project Stages
Designing
The manufacturer of the base model quilting machine provided design specifications as well as example UI designs. I started by reviewing the examples and comparing them to the UI of the previous QMP models. Where features overlapped, I knew it would be best to carry over the existing design elements to keep a cohesive look with the rest of the line.
I sketched out wireframes of each screen in order to quickly visualize the UI, before jumping into a time-intensive design program. These wireframes were reviewed by a subject matter expert to validate the usability of the concepts.
Building
After drawing 16+ lo-fidelity wireframes, it was time to move into building the prototype screens. Previous QMP UIs were built using Photoshop, but I started from scratch using Adobe Illustrator. I utilized Illustrators tools to produce matching components and prepare assets for developer use with efficiency.
With the end user in mind, my goal was to ensure consistency across every screen. A quilter using this machine for the first time should be able to navigate the features without relying on the manual and they should be able to predict the results of pressing a button beforehand.
Iterating

When all the screens were digitally built following the wireframes, I again needed to review with a potential user to gauge the usability of the design. I reached out to Janome’s official longarm expert, Kelley. All screen designs were shared with her and I hosted a meeting to hear her feedback. Overall she appreciated the consistency with the previous model. She gave recommendations to rearrange some elements as well as substitute or add written labels where icons were not successfully communicating details.
The main change we made at this point was the addition of the submenu navigation screens. In the manufacturer’s UI, a user would click the “Tools” button and be brought straight to one of the Tools subpages. It was not clear that they could then navigate to other Tools pages. Instead, we decided to add a submenu between these steps. These screens gave users the opportunity to see all the subpage options and associate the icons with the page titles.

-
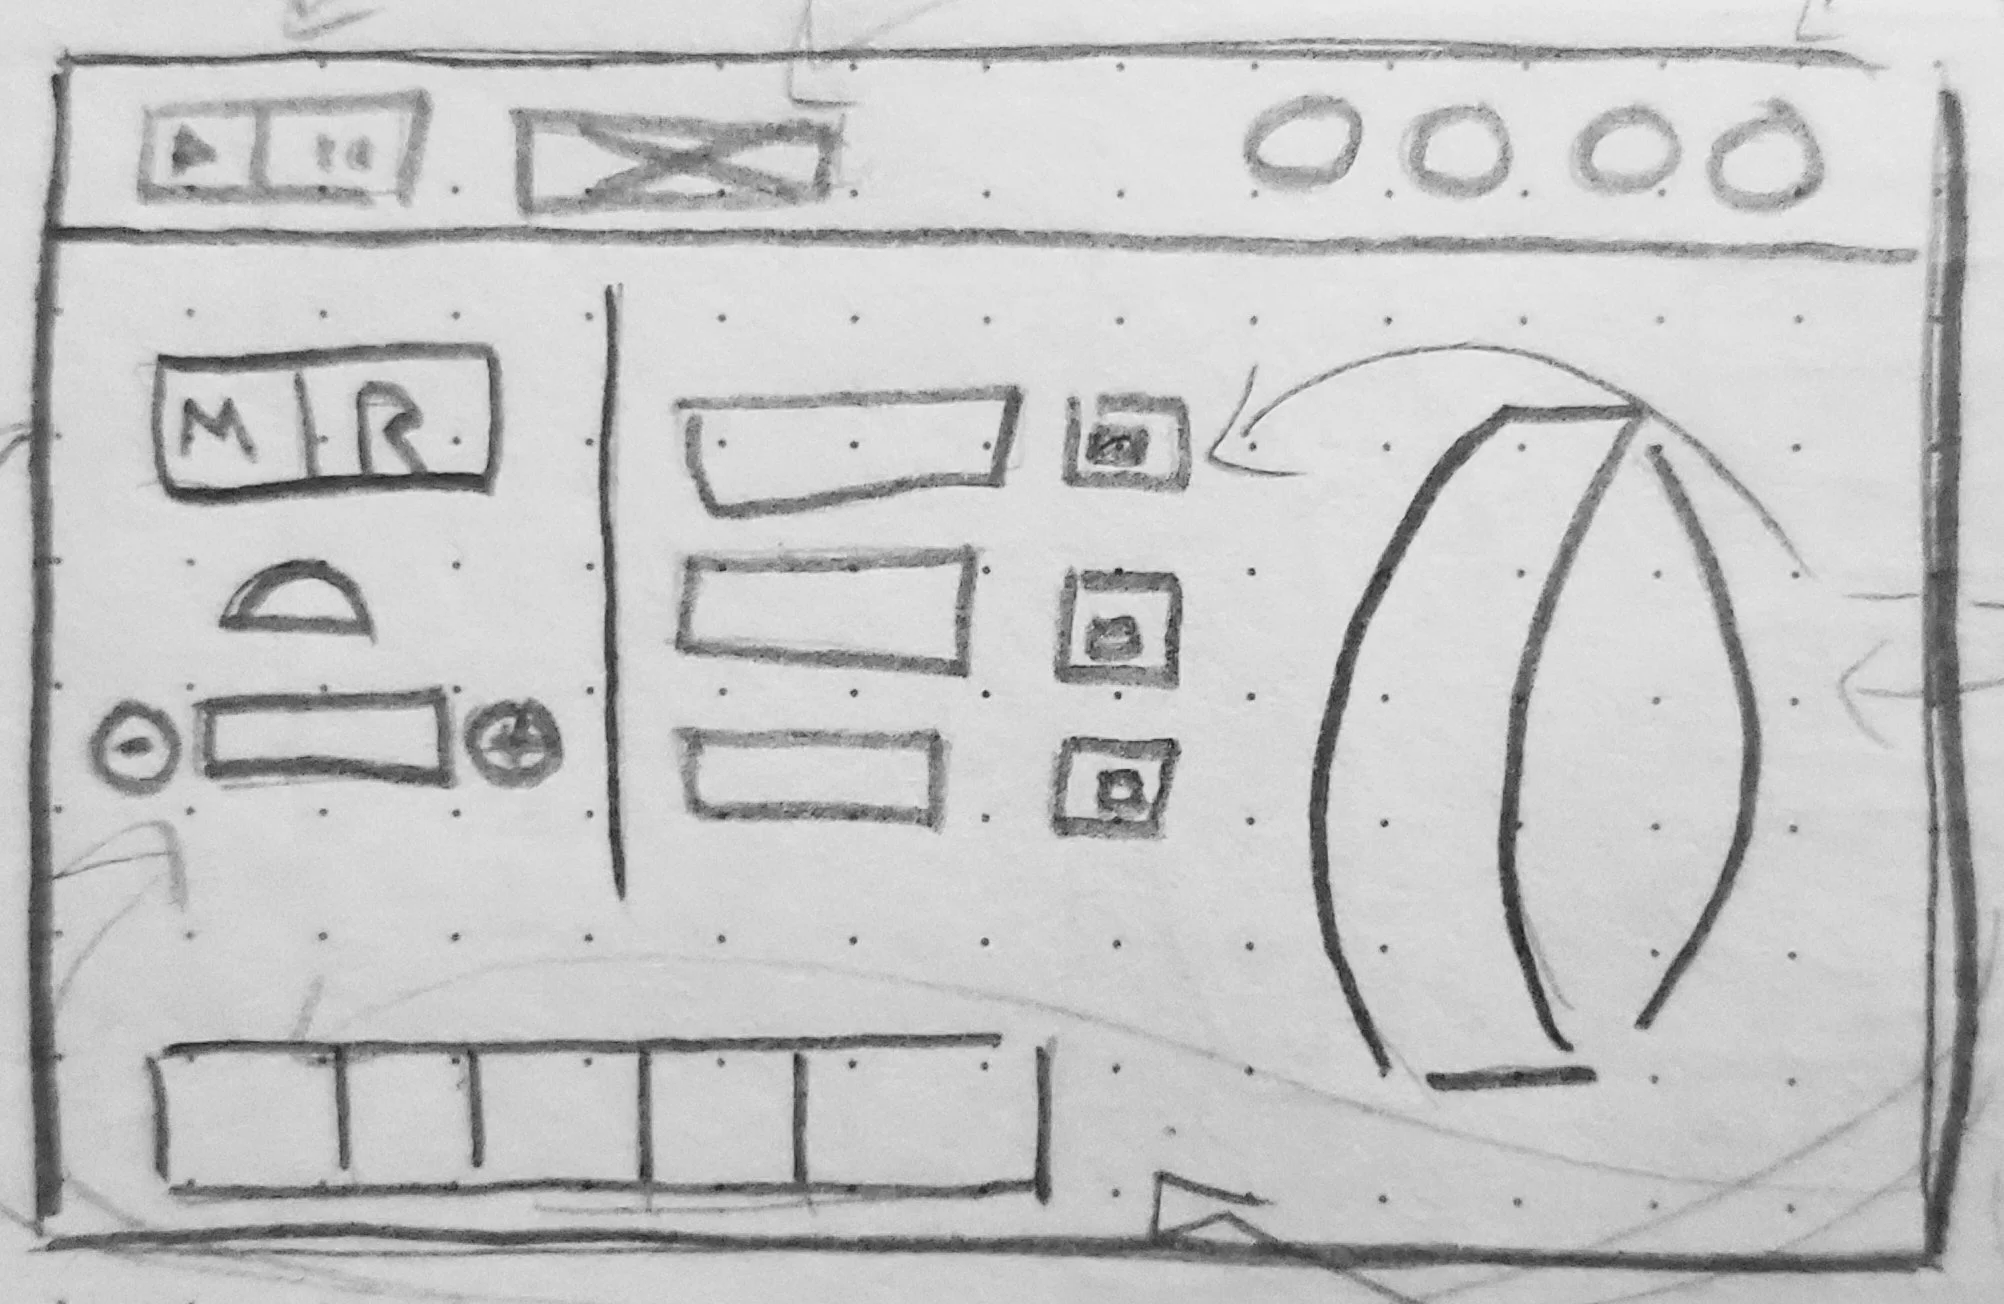
![Wireframe First Pass]()
Draw it
-
![Wireframe Second Pass]()
Make it Better
-
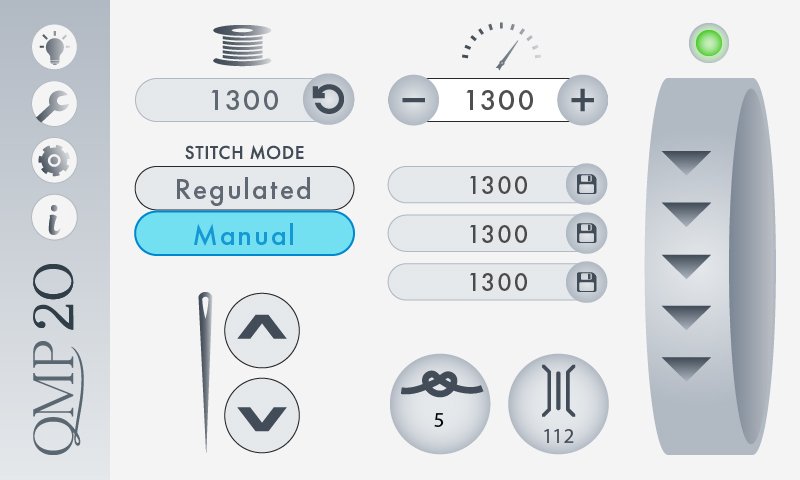
![Prototype First Pass]()
Build it
-
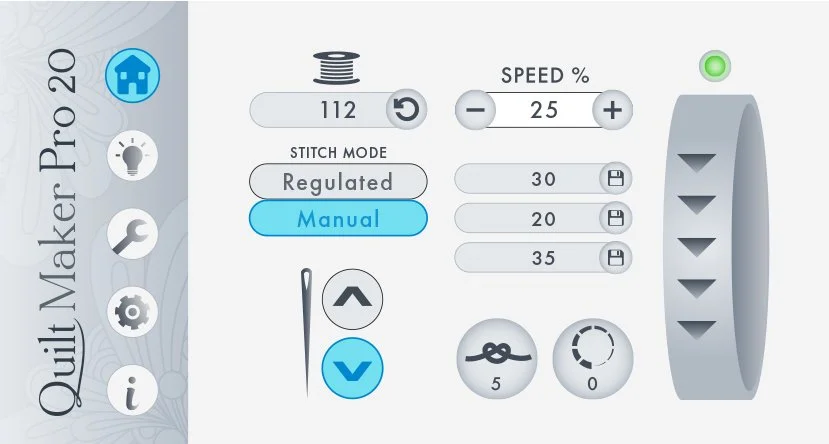
![Final Design]()
Make it Better

-
A major disaster arose after the initial pass-off. The dimensions of the screens were designed at did not match the new machine size. In order to keep the project on schedule, I came up with the solution to push the logo to the left to make up the empty space, the active areas to the right could remain relatively untouched. Only the side panel needed updating and the rest of the screen designs moved forward with development.
Development
I worked closely with the software developers. I exported all elements separately and shared them with the developer in clearly labeled and organized folders. If assets required updates, I quickly provided the necessary changes.
Regularly, I reviewed the screen designs as they were completed by developers. I collaborated with developers to work through any hiccups, ensuring that the final User Interface looked and worked just as intended.

Using the QMP20

Synchronous Projects
While building out the UI, I was also prepping all other design materials for the QMP20 launch.
Logo + Branding
Button Overlay Stickers
Machine Decals + Plastic Casing Color
Photography
Manual
Shipping Carton
Digital Ads
Launch Email
Educational and training materials
Additional sales resources
-
Shout out to my co-worker at the time, Marina Pantoliano, a talented videographer and editor. Although we hadn’t collaborated on this particular project, she was my rock and her support helped launch the QMP20!
Reflections & Learning
In retrospect, there are some things I would do differently if I could, however, most of our work I am extremely happy with. This was my favorite project of my UX Master’s program!
Who is the User?
In the development phase of this project, one of the developers pointed out that in many places, the design relied on written language. I had made this decision because the user I had in mind was someone who had just assembled their machine and is not very technologically literate. I assumed wording would be more helpful than iconography when navigating for the first time.
The developer, however, pointed out that I had not considered non-English speaking users. Iconography is universal and more users would benefit from its use. I’m now more cognizant about the users who are unlike me that I am responsible for giving a voice to.
Using the Right Tools
All the screens and elements were built using Adobe Illustrator, additional assets used Photoshop. In retrospect I really wish I had used XD or Figma. These tools were made for User Interface projects like this and would have let me reuse elements, create the alternate states, and pass on to developers with less friction. At the time I had the skill set to use XD, but the choice to use it went right over my head. You will never see me using Illustrator to build out dozens of screen designs ever again.